Agntix - Digital Agency & Creative Portfolio NextJs Template
For any support please don't hesitate to contact us at Support Center. We provide 13 hours real-time support for our customers.
We would like to thank you for choosing Agntix - Digital Agency & Creative Portfolio NextJs Template.
Requirements
There are system requirements in order to install and setup Agntix - Digital Agency & Creative Portfolio NextJs Template and its components properly. Make sure that you are
installed node.js and
Yarn.
The template is easy to customize, ensuring a unique and professional look for your business. Get ahead of the competition and stand out in the market with our React Nextjs template for businesses.
Template Features
React JS
Next JS
Typescript
Bootstrap v5.x
Font-awesome
jQuery
Gsap Animation Included.
Webgl Animation Included.
Three.js Animation Included.
Scroll Animation Included.
Hover Animation Included.
Distortion Animation Included.
Split Text Animation Included.
Scroll Magic Animation Included.
Hover Effect Animation Included.
45+ Awesome Homepage
Responsive Design
Pixel Perfect Design
Clean Code & Unique Design
Easy to Customize
What's Included
After purchasing Agntix Digital Agency & Creative Portfolio NextJs Template on themeforest.net with your
Envato account, go to your Download page. You can choose to download Agntix Digital Agency & Creative Portfolio NextJs Template package which contains the following files:
The contents of the template package downloaded from ThemeForest
Agntix - An HTML Template file. this file you can edit and use for your business.
Documentation - This folder contains what you are reading now :)
React Installation
Please follow the instructions.
For local host: -
Open you command prompt
npm install or npm install --legacy-peer-deps
npm run dev (will start the dev server at
http://loaclhost:3000)
To deploy a Next.js application on Vercel, you can follow
these steps: -
Sign up for an account on Vercel if you don't have one
already.
Connect your GitHub, GitLab, or Bitbucket repository where
your Next.js application is hosted.
Import your repository on Vercel and select the Next.js
project to be deployed.
Vercel will automatically detect your Next.js application
and perform the necessary build and deployment steps.
Once the deployment is complete, you'll be able to access
your application using the URL provided by Vercel.
Template Site Setting
Change Site Title, Favicon and Page Title
To change your Site title and Favicon open the Bhume Real estate in
your editor and go to the location by following screenshot which are given
bellow.
You can change favicon hereYou can change title hereYou can change favicon here
Customize Menu
To customize menu do the following:
From the project folder go to src dataheader-menumenuData.tsOpen the menu you want to
use
Then customize the menu
Customize the menu
Customize Footer
To customize footer data do the following:
From the project folder go to src layoutsFootersOpen the footer you
want to use
Then customize the footer
Customize the footer
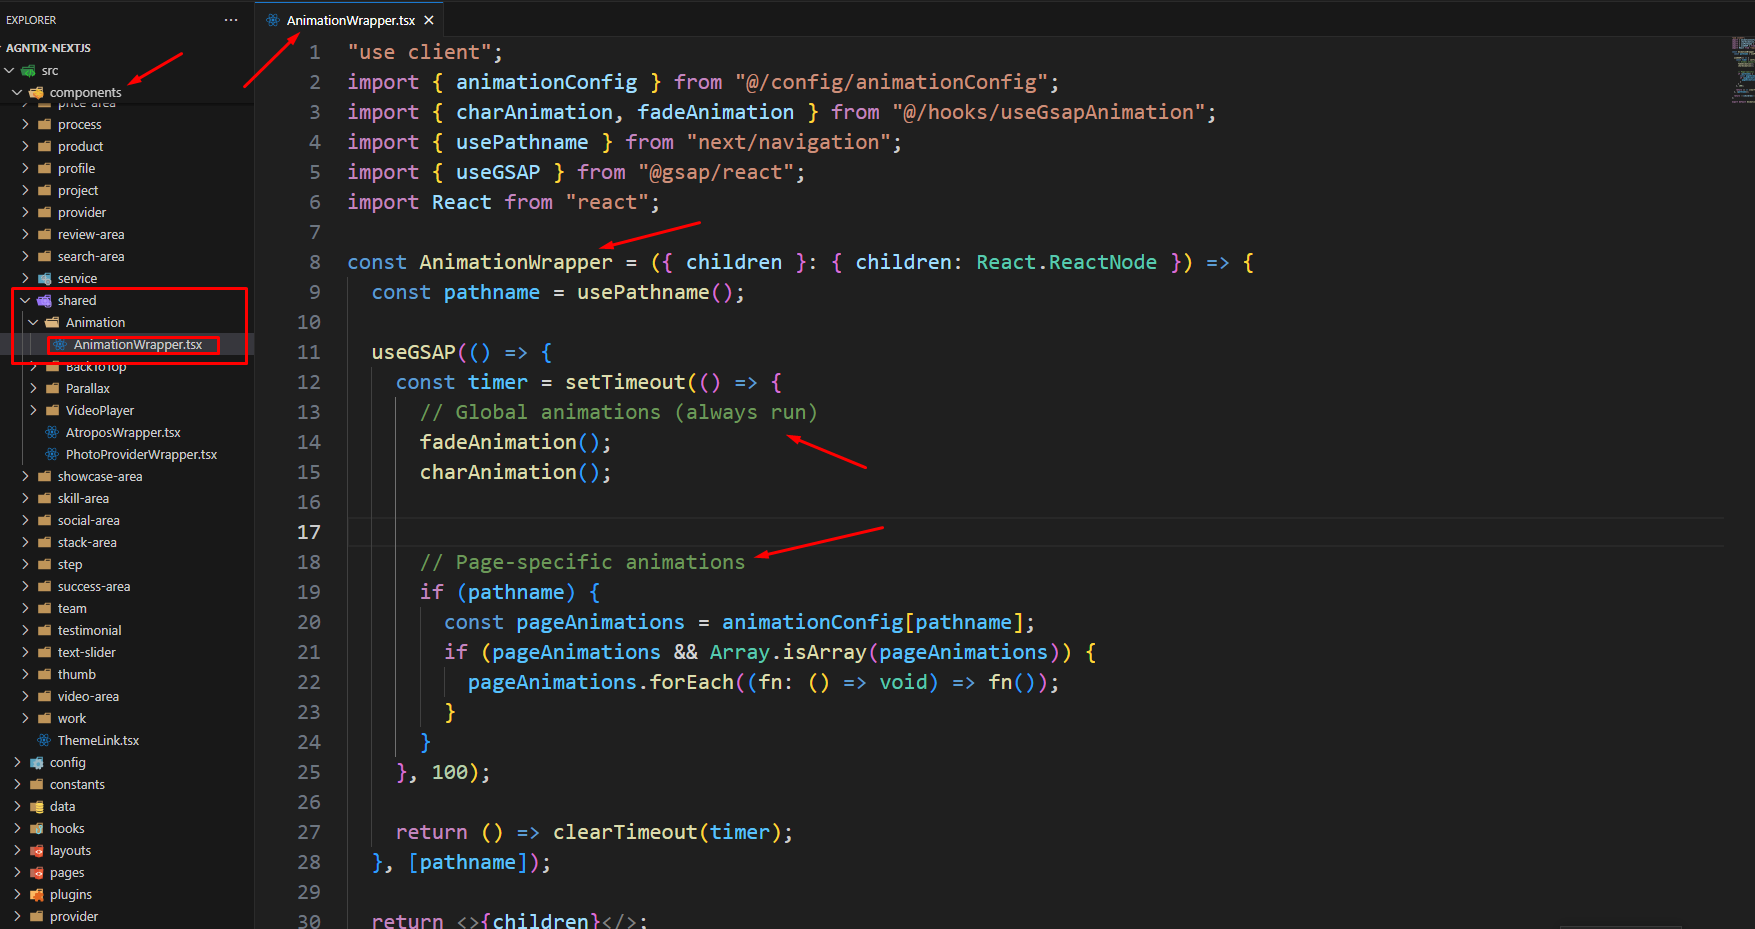
GSAP Animation
How I Used Hook and Component
I implemented a reusable React hook to handle all GSAP animation logic (such as fade-in, split text, and scroll-trigger effects) for a cleaner and more maintainable codebase.
The AnimationWrapper component dynamically maps animations based on the current pathname using the centralized animationConfig.ts file.
This ensures that only the animations relevant to the active route are executed.
Additionally, the wrapper intelligently manages both SSR and CSR rendering contexts, preventing unnecessary client-side rendering and improving overall performance.
Example of creating animation with hook (fade animation, split text, scroll trigger setup)
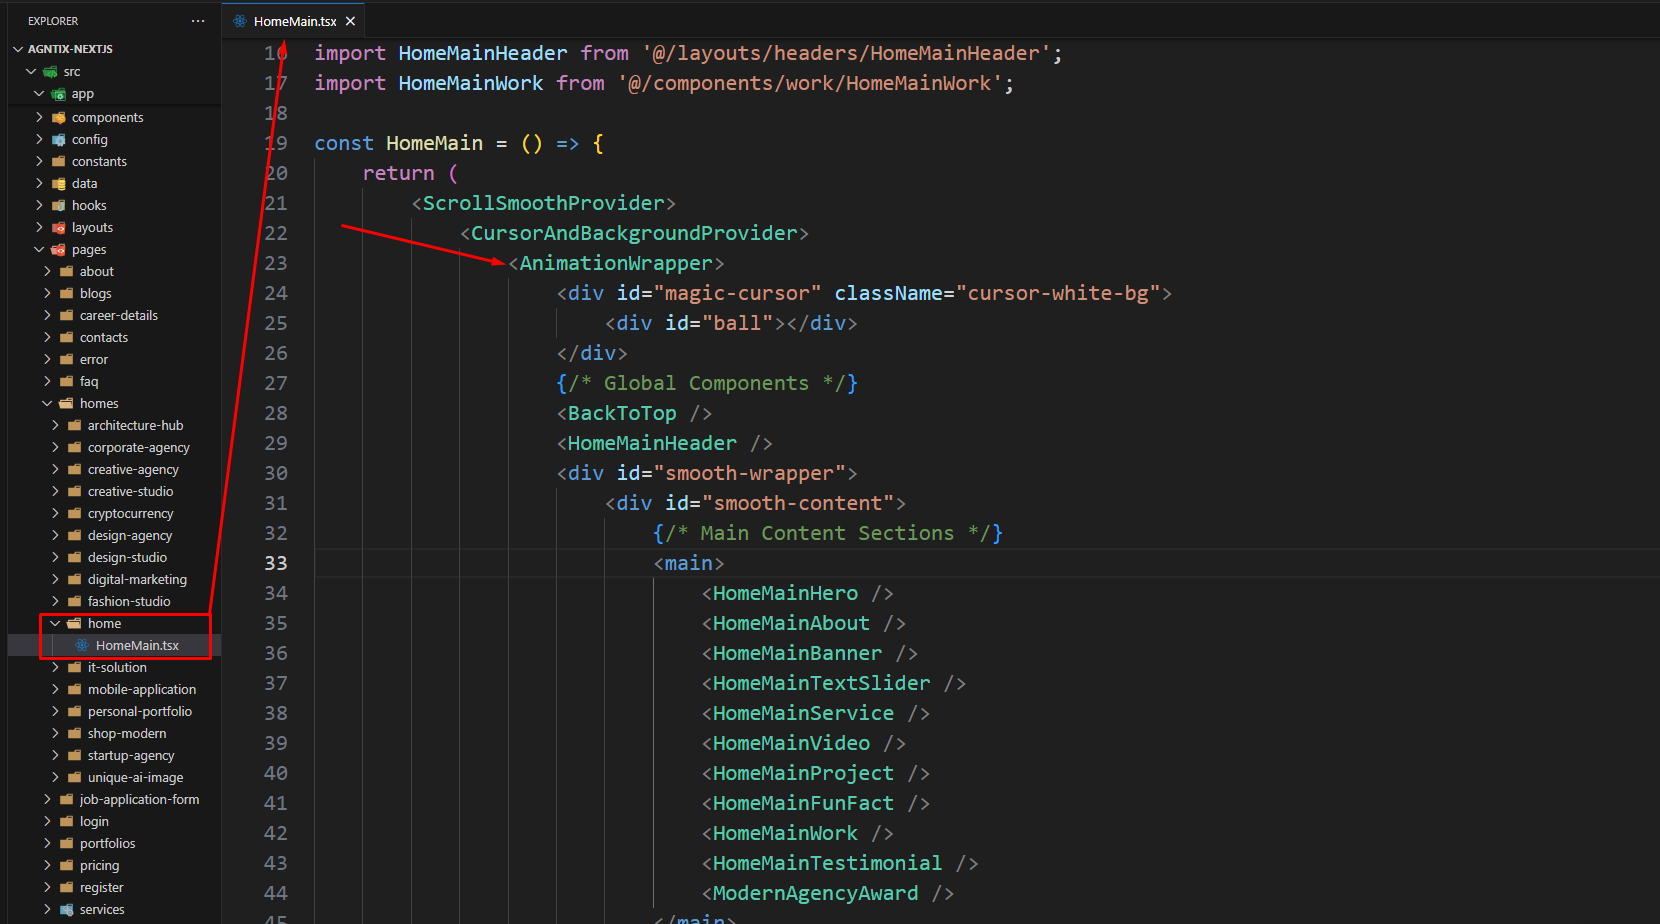
Example of using route-based animations inside a component with useGSAP and a custom hook.
Example of using route-based animations inside a React component with useGSAP and a custom hook, combining global and page-specific effects.
Example of using the animation wrapper that handles both global and page-specific GSAP animations using useGSAP and a custom hook
404
To change 404 and setting you can change by following this screenshot here.
From the project folder go to src appnot-found.tsxOpen the page you want to
use
Then customize the 404 data
Customize the 404
Customize Portfolio Data
To change Portfolio data and setting you can change by following this screenshot here.
From the project folder go to src dataportfolio.tsOpen the data you want to use
Then customize the portfolio data
Customize the portfolio data
Customize blog Data
To change blog data and setting you can change by following this screenshot here.
From the project folder go to src datablogData.tsOpen the blog data you want to use
Then customize the blog data
Customize the blog data
Customize product Data
To change product data and setting you can change by following this screenshot here.
From the project folder go to src dataproductData.tsOpen the product data you want to use
Then customize the product data
Customize the product data
Changing template colors
Open the colors.scss file from public > assets > scss >
utils folder with a text-editor.
Change the right-side values of the variables to change any default colors of your
site.
Save your file.
Changing template colors
Open the colors.scss file from public > assets > scss >
utils folder with a text-editor.
Change the right-side values of the variables to change any default colors of your
site.
Save your file.
Support
If you face any issue please contact us at
Support Ticket. We provide 15 hours real-time support for our customers.